
Overhead CB/Ham radio install
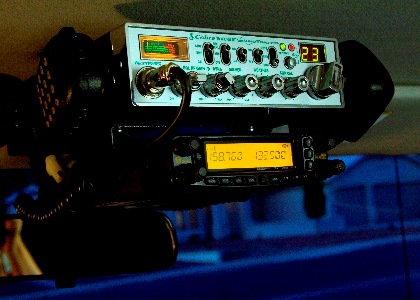
{tab=Overhead CB Install}

{tab=Pictures}
{gallery}issues/2009/apr09/cbinstall/{/gallery}
{/tabs}
This method of install will take about six to eight hours to complete, so make sure you have plenty of time. You will need basic tools and help from the feminine persuasion if available (I’ll explain that detail later). Wear hospital type gloves when working around the headliner to keep it clean. As each component is removed, use painters tape to wrap the threads to secure the bolt or screw to the component (Fig 1). If you’re going to paint the radio mounting bracket, it’s best to do that several days before you start the install.
Read all instructions before you start!
Tools:
Ratchet, 3/8” drive
Extension, 3/8” drive
10mm, 3/8” drive deep socket
Philips #2 screw driver
Small blade screw driver
Wire cutters
Crimp tool
Side cutter pliers
Hand drill (use a drill press if available)
Assorted Drill bits
Soldering iron
Plastic container for parts
Sharpie permanent marker
Razor knife
Needle
Supplies:
Painters tape
Electrical tape
Duct tape
Shrink tubing
Crimp connectors
Soldering flux
Solder
Zip ties
Plastic bushing (Available at many hardware stores)
Hospital gloves
Inserts nuts, (1/4” – 20) (available at Home Depot, Lowes, and hardware stores)
Epoxy
Permatex silicone adhesive or equivalent (Automotive stores)
Wood block (use maple if available, size to be determined)
1) Measure the radio bracket length and add one inch. That will be the length of your wood block. Find the thickness of the wood block by attaching the radio bracket to the radio. Place painters tape on the headliner where the radio will be mounted (Fig. 2). Now hold the radio to the headliner where you want it located. Allow enough room behind the radio for wiring and proper function of the sun visors. Using a sharpie permanent marker, mark the painter’s tape showing the location of the radio mounting bracket. Now separate the radio from the mounting bracket. Again hold the mounting bracket to the headliner and mark the mounting holes. Place a long needle or equivalent on one of the locations you marked for a hole and push it through the tape and headliner until it touches the metal roof (fig. 3). Holding the needle at the headliner withdraw the needle and measure it (Fig. 4). Now subtract 3/16th” from your measurement and that’s the thickness of your wood block. The width is not critical; 2.5 inches will work well. I know this seems like a lot to go through to get dimensions for a wood block, but if the thickness dimension is off you’ll risk distorting the headliner!
2) Now center the mounting bracket on the wood block and mark the location for each hole to be drilled (Fig 5). Using the package instructions that came with your insert nuts, drill appropriately sized holes through the wood block. Apply epoxy to the to insert nuts and screw them into the wood block (Fig. 6, 7).
3) Drill 5/16” holes in the headliner where previously marked in step (1) (Fig. 8). Use gentle pressure on the drill as the headliner has a foam core. As soon as the drill penetrates the headliner stop the drill and pull it from the headliner.
4) Remove all cosmetic bolt covers on the handholds, rear view mirror, and door latch covers (Fig. 9) using a small blade screw driver. Wrap the screw driver blade with a layer of electrical tape to protect the plastic from scratches (Fig. 10). Using a 10mm socket, remove the bolts under each cover (Fig 11). After the A-pillar handholds are removed, remove the A-pillar garnish. Disengage two fasteners by pulling the A-pillar garnish inward. (Fig 12)