
T100: Ham Radio Install w/APRS
 This past summer I took the test to get my amateur radio (HAM) license. One thing that interested me about amateur radio was APRS, or Automatic Packet (Position) Reporting System. APRS basically uses radio waves to transmit data automatically at various intervals. The information transmitted can include many different items, but one bit of data often transmitted is GPS coordinates. This location data can be very useful to keep track of others in your group, or for someone at home to monitor your off-road location. http://aprs.fi/ is one online site that shows recent APRS user locations. Information of local APRS users can also be shown on your radio or on an attached GPS device.
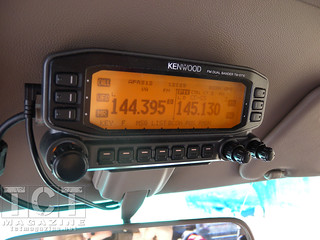
There are many ways to set up an APRS system. I decided to install a Kenwood TM D710a since it is able to handle all the data internally, has APRS controls built in, and dual-band capabilities. The dual-band allows operation of the APRS on one band and talking on the other band (two radios in one), reducing the number of radios installed in the truck. The radio is also able to act as a repeater and rebroadcast the signals from my lower powered handheld radio at a higher power from the truck.
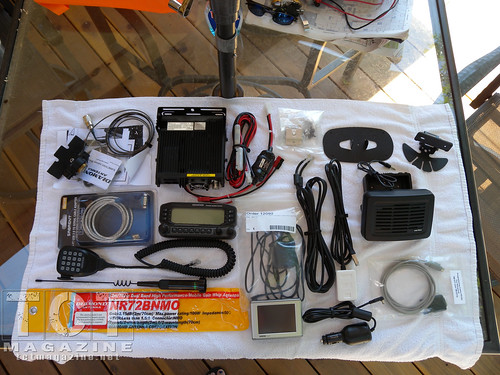
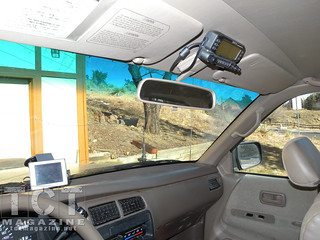
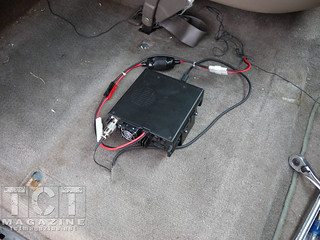
I laid everything out and assessed the parts and cable lengths. <<7>> I spent time trying to figure out how to fit all the parts in the truck and still leave everything looking good. One thing my wife did not want was wires laying all over the truck getting in the way. I test fit the control panel in several places on the dash, but it interfered with various other controls, was in the way of my legs, or was hard to reach. I could not mount anything to the top of the dash, since my short wife wouldn’t be able to see over it when she drives. I opted to mount the controls over the rear view mirror. This location offers good access to the panel for both the driver and the passenger and is generally out of sight from outside of the truck. The body of the radio was placed in a pretty standard location under the passenger seat to keep it out of view and keep the kids from stepping on it. The GPS was wired up to mount to the windshield with the included suction cup mount.
To mount the control panel, I removed the mirror. The back of the mirror bracket had some plastic that fit into the sheet metal of the truck roof. I needed to cut off this section of the mirror bracket to allow the control panel bracket to sandwich between the truck roof and the mirror mount. A quick test fit was done to see where the mirror mounting screw lined up. I was hoping it would fit into a slot in the radio’s mounting bracket, but I needed to mark a spot and drill a hole. Once drilled, the bracket and mirror were reattached and one of the bracket tabs was pressed up into the hole of the sheet metal to make room for wiring to pass through to above the headliner. The wires for the control panel would be hidden behind the headliner.
 Two wires needed to be run to the control panel, one to carry the GPS information and one to connect to the body of the radio. For whatever reason, I decided to run one wire down each side of the windshield, rather than only disassemble one side of my truck. This ended up working well for where the components were installed and to reduce the amount of wires running through each location. I took the trim off of the A-pillars, and had to do one of the toughest parts of the install—remove the handles—there was a massive amount of thread-lock on each of the screws. Once opened up, I used some stiff wire to fish the wires through the headliner and then ran them down the A-pillars. The GPS cable has a small conversion box in the center of the cable that complicated where I was able to run the wire. The conversion box for the GPS was tucked beneath the dash on the driver’s side and the other end was brought back up to connect to the GPS unit on the dash. The wire to the body of the radio was brought down the passenger side, behind the kick panel, below the door sill and out under the seat where it pops through a small slit in the carpet.
I checked the clearance of the radio under the seat. After seeing that everything would fit and estimating where the radio should go, I removed the passenger seat. The mounting bracket was put into place and screwed into the floor. Power was run from the battery. I snaked the wires behind the pedals to the center of the dash. then under the carpet to the radio. The antenna was mounted to the hood, and the antenna wire was run back to the radio. next to the control wire.
 Once I had all the wires hooked up, I finished putting the truck back together. This finished install has worked well so far. The control panel is easy to remove when the truck is parked for a while, and is easy to see and reach. The clarity of the radio is amazing over CB quality sound. The only thing I have to work out yet is where to place the freaking huge speaker and if I should mount the microphone.
My wife was not able to go out for an off-road ride so we had the opportunity to test out the system. She was able to pull up the website I mentioned earlier and see where we had been, and at times see exactly where we were. The ability to track my location added an extra degree of safety in addition to having a planned route and wheeling with others.
All Photos!
[flickr set=72157641611929404]
To get your copy of the January 2014 issue of TCT Magazine:   FIND US ON: |
