


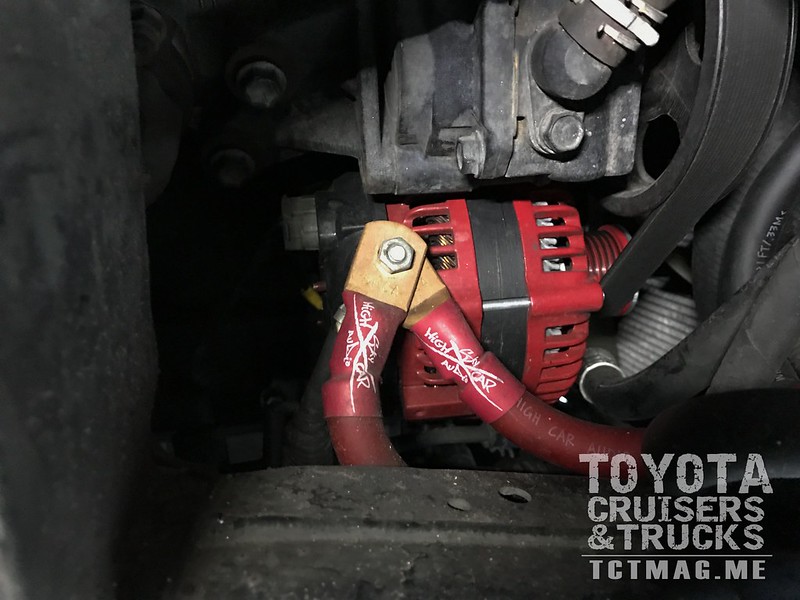
Upon contact, Singer was very helpful and knowledgeable. He really took the time to make sure I was going to get what I needed and be happy with my purchase. He helped me identify which plug I needed (oval or a circular) as the Toyota 4.7L V8 comes with either depending on year and platform. He also made me aware that I would most likely need a 1/2-1" shorter belt since the pulley is slightly smaller on his builds. We decided on a 275-amp upgrade and I opted for the powder coat option in Firetruck Red, which would be a great improvement over the factory 130-amp alt. One of the nice things about Singer is that he doesn't require a core trade in so I still have my perfectly functioning factory unit in case I ever need to ship this one off for warranty. Upon contact, Singer was very helpful and knowledgeable. He really took the time to make sure I was going to get what I needed and be happy with my purchase. He helped me identify which plug I needed (oval or a circular) as the Toyota 4.7L V8 comes with either depending on year and platform. He also made me aware that I would most likely need a 1/2-1" shorter belt since the pulley is slightly smaller on his builds. We decided on a 275-amp upgrade and I opted for the powder coat option in Firetruck Red, which would be a great improvement over the factory 130-amp alt. One of the nice things about Singer is that he doesn't require a core trade in so I still have my perfectly functioning factory unit in case I ever need to ship this one off for warranty.
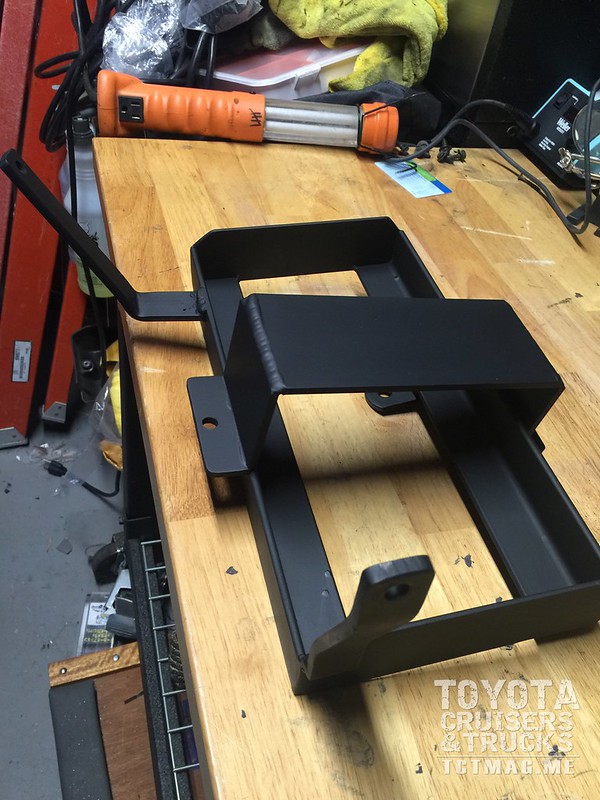
My next objective was to obtain a 2nd battery so I could run a dual set-up. I wanted as much power as I could stuff under the hood. After doing some measuring, I realized I could probably stuff 2 Group 31 batteries under the hood. I had a bracket fabricated by a local shop that would use existing factory holes, allow my passenger side hood shock to move freely and sit the battery low enough to prevent the terminals from touching the bottom of the hood. I opted to have this made from steel since these batteries weigh in at around 70 lbs per.
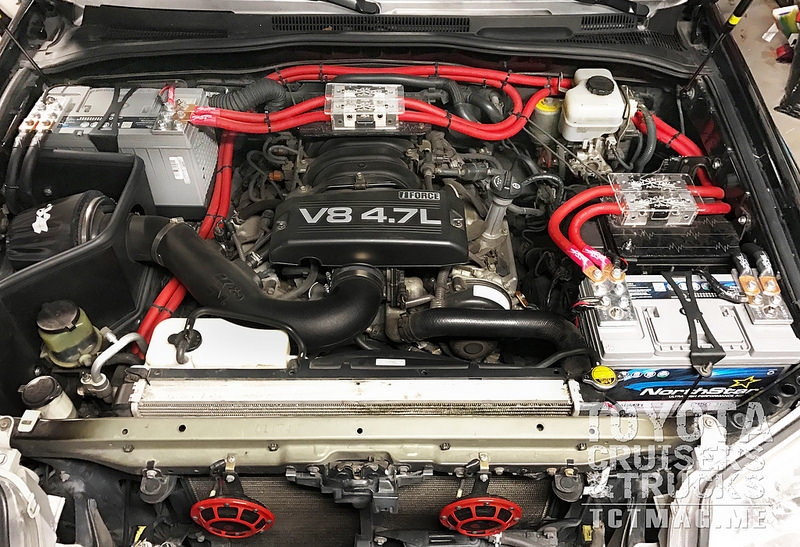
I am convinced NorthStar makes the best batteries on the market. Their batterieshave the thickest casings to protect from heat. I started planning my wiring runs in the engine bay. Using 4/0 cable meant making multiple runs and doing it safely. This required a lot of thought and planning as the wire is thicker than most welding wire, and comes in just under 1-inch OD, including insulation. I decided to use oxygen free copper (OFC) wire as it has much better conductivity than copper clad aluminum (CCA) wire and is much less prone to corrosion. I ordered a couple of spools, some matching size copper lugs (4/0), and heat-shrink to protect everything.
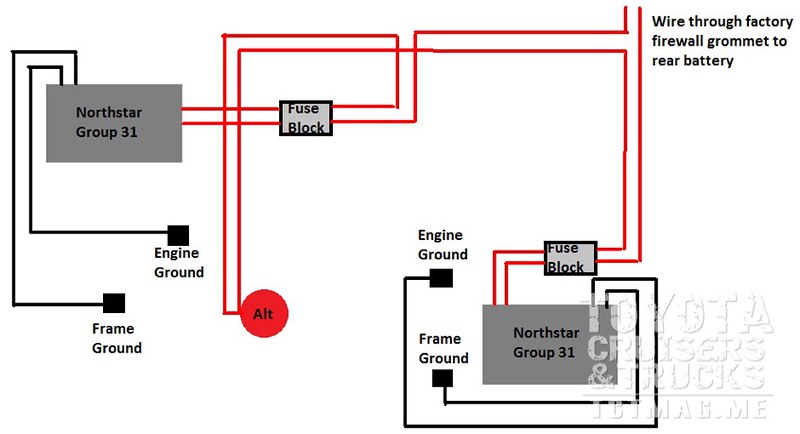
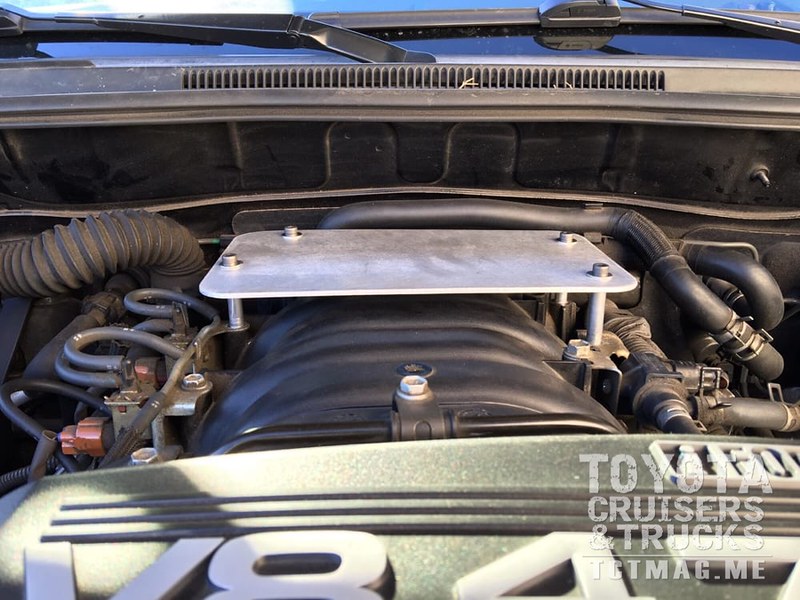
Once I had my wire runs planned, I started figuring secure fuse block placement while still utilizing factory mounting holes. I worked with Andrew at TRAC performance to get brackets fabricated for me to mount the behemoth fuse blocks. I decided that for my 2nd battery, the bracket needed to mount onto the intake manifold so it could be within 12 inches of the connection. While we were trying to figure out how to raise it up so that it wouldn't take all the heat from contacting the engine, Andrew's genius led to utilizing hardline, for an air ride or brake set up, cut to length and sourcing some longer hardware to bolt into the factory holes. I ended up adding sound deadening (butyl) to the brackets to reduce vibrations during driving. I also had TRAC Performance make some matching battery tie downs as well as the bracket that mounts atop the factory fuse box for the primary battery.
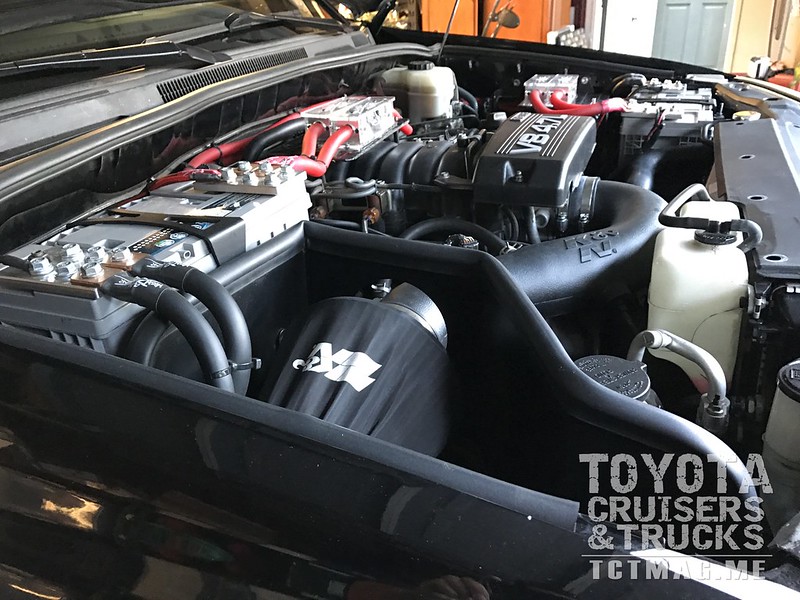
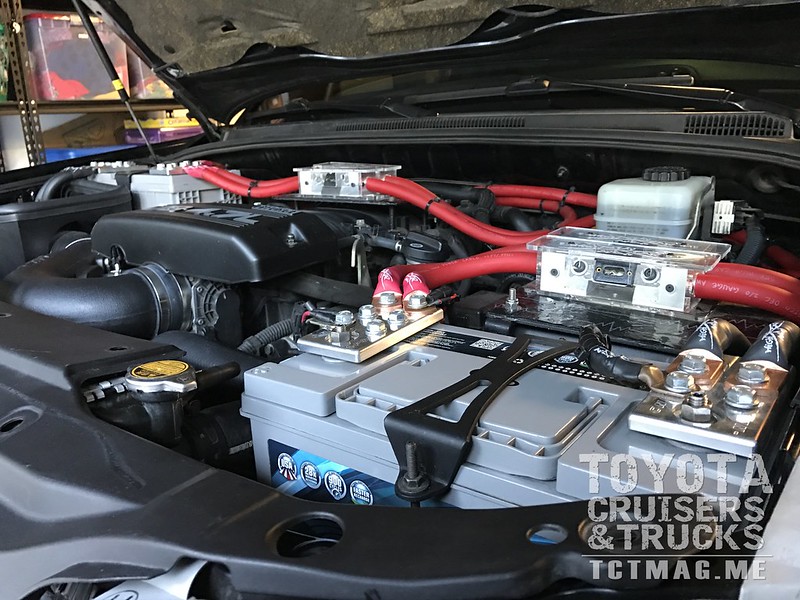
When doing my wire runs, safety was always priority and aesthetics were a close second! I could've easily ran one cable across the radiator bracket to the driver side battery, but in the event of a front-end collision, that wire could be pinched and possibly start a fire. Many hours and zip ties were sacrificed to get everything up to snuff for this addition to my 4Runner. Making multiple connections to a battery is a daunting task using the factory terminal connections. I sought out a solution that would accommodate the size of wire I was using as well leave me options for future expandability. When doing my wire runs, safety was always priority and aesthetics were a close second! I could've easily ran one cable across the radiator bracket to the driver side battery, but in the event of a front-end collision, that wire could be pinched and possibly start a fire. Many hours and zip ties were sacrificed to get everything up to snuff for this addition to my 4Runner. Making multiple connections to a battery is a daunting task using the factory terminal connections. I sought out a solution that would accommodate the size of wire I was using as well leave me options for future expandability.
CNF Distribution with their 6-lug machined aluminum battery terminals. These things are a treasure to hold in the hand and come in both aluminum and copper with either machined or polished finish and use a 3/8" bolt to secure the connection. Light bars, HID's, Hella Horns, relay banks, switches, etc all tie in to these and make life so much easier.
This project has been fun and in the end, I have enough power now for virtually anything I can throw at it, up to and including a 15,000-watt stereo system.
Some things to keep in mind if you are planning on doing this to your own ride are: Some things to keep in mind if you are planning on doing this to your own ride are:
-There are a few kits on the market to add a 2nd battery in your rig, most of them will not accommodate a group 31 size battery. If you want to try to add a group 31 as the secondary battery, take it with you to the fab shop and ensure that it clears the hood shock. Also, ensure the terminals not touch the bottom of the hood.
-It's always a good idea to mount your battery so that the negative terminal is closest to the body just in case the battery ever moves, also- you can never use too many zip ties. The last thing you want is a live cable flopping around and shorting out
-If you are planning to upgrade your alternator- you really get what you pay for. The less reputable brands have very high failure rates and generally do not make anywhere near the rated power they advertise. There are a few reputable companies that make aftermarket alternators that will last and make good power. If you are in the market for one, consider Singer, DC Power, US Alternators, OhioGen, Mechman, and Iraggi. make good power. If you are in the market for one, consider Singer, DC Power, US Alternators, OhioGen, Mechman, and Iraggi.
Product sources:
http://www.northstarbattery.com
https://www.facebook.com/CNFDistribution/
To get your copy of theSpring 2017 Issue:   FIND US ON: |