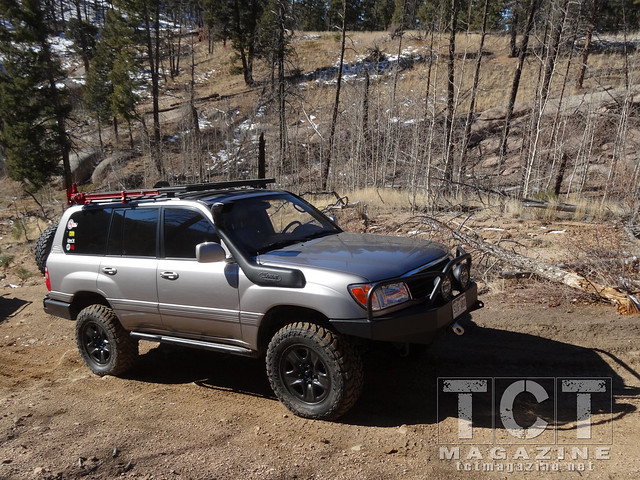
Due to the expense, one of the last large modifications to our Land Cruiser was going to be the locker installation and re-gear and my wife and I began budgeting for it in advance. We had hoped to complete it before Cruise Moab in the spring. Unfortunately, my breakage happened before I could get to it, on a Rising Sun trail run in October where we ran into some snow and ice. We were second to last in the group and the trail had become snow packed and icy. To keep the 100 from sliding out of control I resorted to putting the transmission into reverse while sliding down a steep icy section. With all four tires spinning freely on the ice, my passenger front tire suddenly gained traction on a rock under the snow and “snap”, the dreaded blown diff sound. Not a good night wheeling. I resorted to this in order to keep the 100 from rolling off the steep portion of this trail and hitting a tree. After a few choice words, we got out and checked everything and debated on how bad it was. We were not in the right place to start wrenching, so we continued limping down the trail. With every clunking rotation of the ring gear, I just hoped it would stay intact enough to get to the trailhead. Once there, we pulled the drive flanges and disconnected the front driveshaft so I could get it home.
Knowing that I could save money if I did the repair myself, I also knew it would be a long-term commitment and I would have to invest in some specialized tools and supplies which would quickly add up. Installing the lockers is fairly straight forward, but with the addition of new gears, I wanted to ensure it was done correctly. Attaining the correct pinion depth, backlash measurements and carrier bearing preload was key in not having to do this again. I made a few phone calls to Christo at Slee Off-Road and Carl at Just Differentials to see what I was in for. After speaking to the experts, I decided to let them take care of this project.
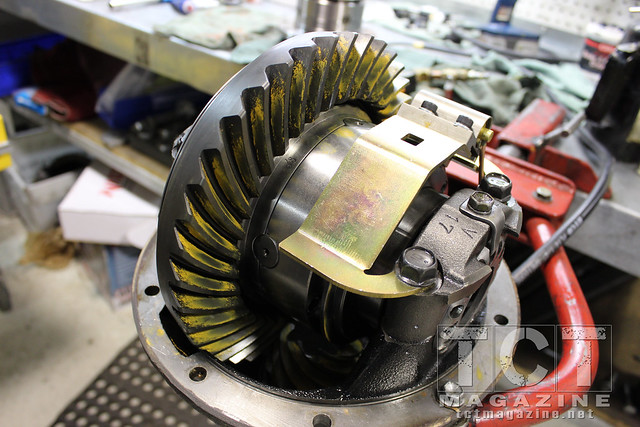
With the emergence of TJM back into the U.S. market and their new locking differential design, I thought I would give a newer product a shot. The new TJM Pro Locker is an air-locking differential that features an external actuator, which bolts through and to the bearing main cap with a bracket. I really liked the design of the new piston style actuator, which eliminates the possibility of oil being pumped into the airline. As we all know, this can potentially destroy your air compressor. There is also no seal, which has proven to be a weak point in other designs so it is not prone to failure over an extended period and is essentially maintenance free. TJM has been producing the Pro Locker in Australia since 2005 and it is available for many different vehicle platforms. No carrier modification is required for the Pro Locker, other than to drill and tap a bulkhead fitting for the airline. The Pro Locker features a strong iron case, large hardened pinion gears, hardened 4 pin cross shafts, a hardened internal lock ring that yields 10mm of engagement over the side locking gear and a limited lifetime warranty.
TJM has been in the off road market in Australia for over 40 years. They began in 1973 selling bull bars to the local emerging 4x4 community and have since expanded to selling a diverse selection of 4x4 accessories. They extended their global reach into the U.S. in 2010 and opened their North American headquarters in 2011. TJM USA now calls Riverside, California home and services both North, and South American off Road enthusiasts. It is good to see the increasing aftermarket options for the 100 Series.
Now that I knew which lockers I was going with, I needed to figure out the gearing since mine were not salvageable. I called Carl at Just Differentials to talk about the project and verify pricing. A fully built 100 Series is going to weigh in over 7,000 pounds, depending on your set up and what you are carrying. With the differentials already opened for the lockers, I opted for Nitro’s 4.88, 29 spline gear ratio upgrade from the stock 4.30, 27 spline for better performance and strength, especially at the front where I sheared mine. There are no 100 Series full float rear differentials in the states. The 100 Series has a 9.5-inch rear and 8.5-inch front differential, so the 4.88 gear ratio set is max for an unmodified 3rd member housing. The quality in Nitro’s gear sets is unmatched and their precision machining, heat-treatment and computer controlled lapping process provides for excellent contact patterns. They are the strongest, quietest gear setup available. Carl is also a 100 Series owner and Just Differentials has over 60 years in the business, so these are the guys to talk to.
Fortunately, I live near Slee Off-Road in Golden, Colorado and they are my go to shop. I spoke with Christo Slee and he ordered all the parts through Carl at Just Differentials and I reserved a couple days in the garage to get the work done. I knew in having a reputable shop do the work; I had the assurance that the job was going to be done correctly. Slee Off-Road stands behind the products they sell, so if there are any issues after the install, it is easier for a dealer to contact the manufacturer to rectify the situation rather than an individual. Christo and the technicians at Slee Off-Road are some of the most knowledgeable 80/100 Series guys around and I looked forward to beginning the project.
On a 100 Series, Slee recommends taking the knuckles off for ease of removing the front diff. This is a good time to check other components for wear while everything is being taken apart. They recommend checking the CV axle, axle seals, spindle bearings and bushings, lower ball joint and the wheel bearings. I replaced my passenger CV axle as the grease was rusty, it had worn splines and the outer stub shaft was showing signs of wear. My bearings and bushings showed grease contamination, so these were replaced and the lower ball joint was replaced as well.
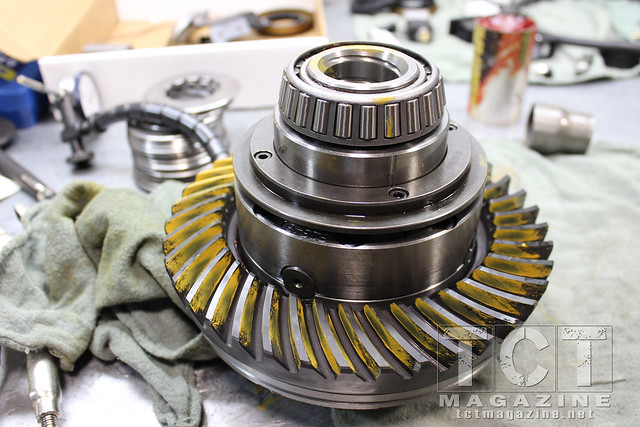
Joe at Slee Off-Road keeps track of all the differential rebuilds and during the install he noted that the pinion shim consistencies between Nitro gears is very reliable and the tolerance is excellent. When removing the Nitro gears from the box, you can tell how much stronger and thicker they are compared to the stock 4.30s. After cleaning all the parts and getting the cosmoline off the gears we heated them. Toyota recommends boiling the gear in water and letting the metals expand slightly, which allows it to slide over the carrier easier.
It is noted in the instructions from Nitro not to use the bolts to draw the ring gear onto the carrier. Joe uses a small oven at 212 degrees until hot, which is probably easier then using a large dead-blow hammer, drive the gear into place. After bolting on the external actuator for the locker and attaching the bracket to the bearing main cap, we ensured the tube routing was not touching anything inside the housing. This then is routed through the bulkhead fitting port that was installed after the housing was drilled and tapped. We then installed the pinion and then the carrier and ring gear assembly.
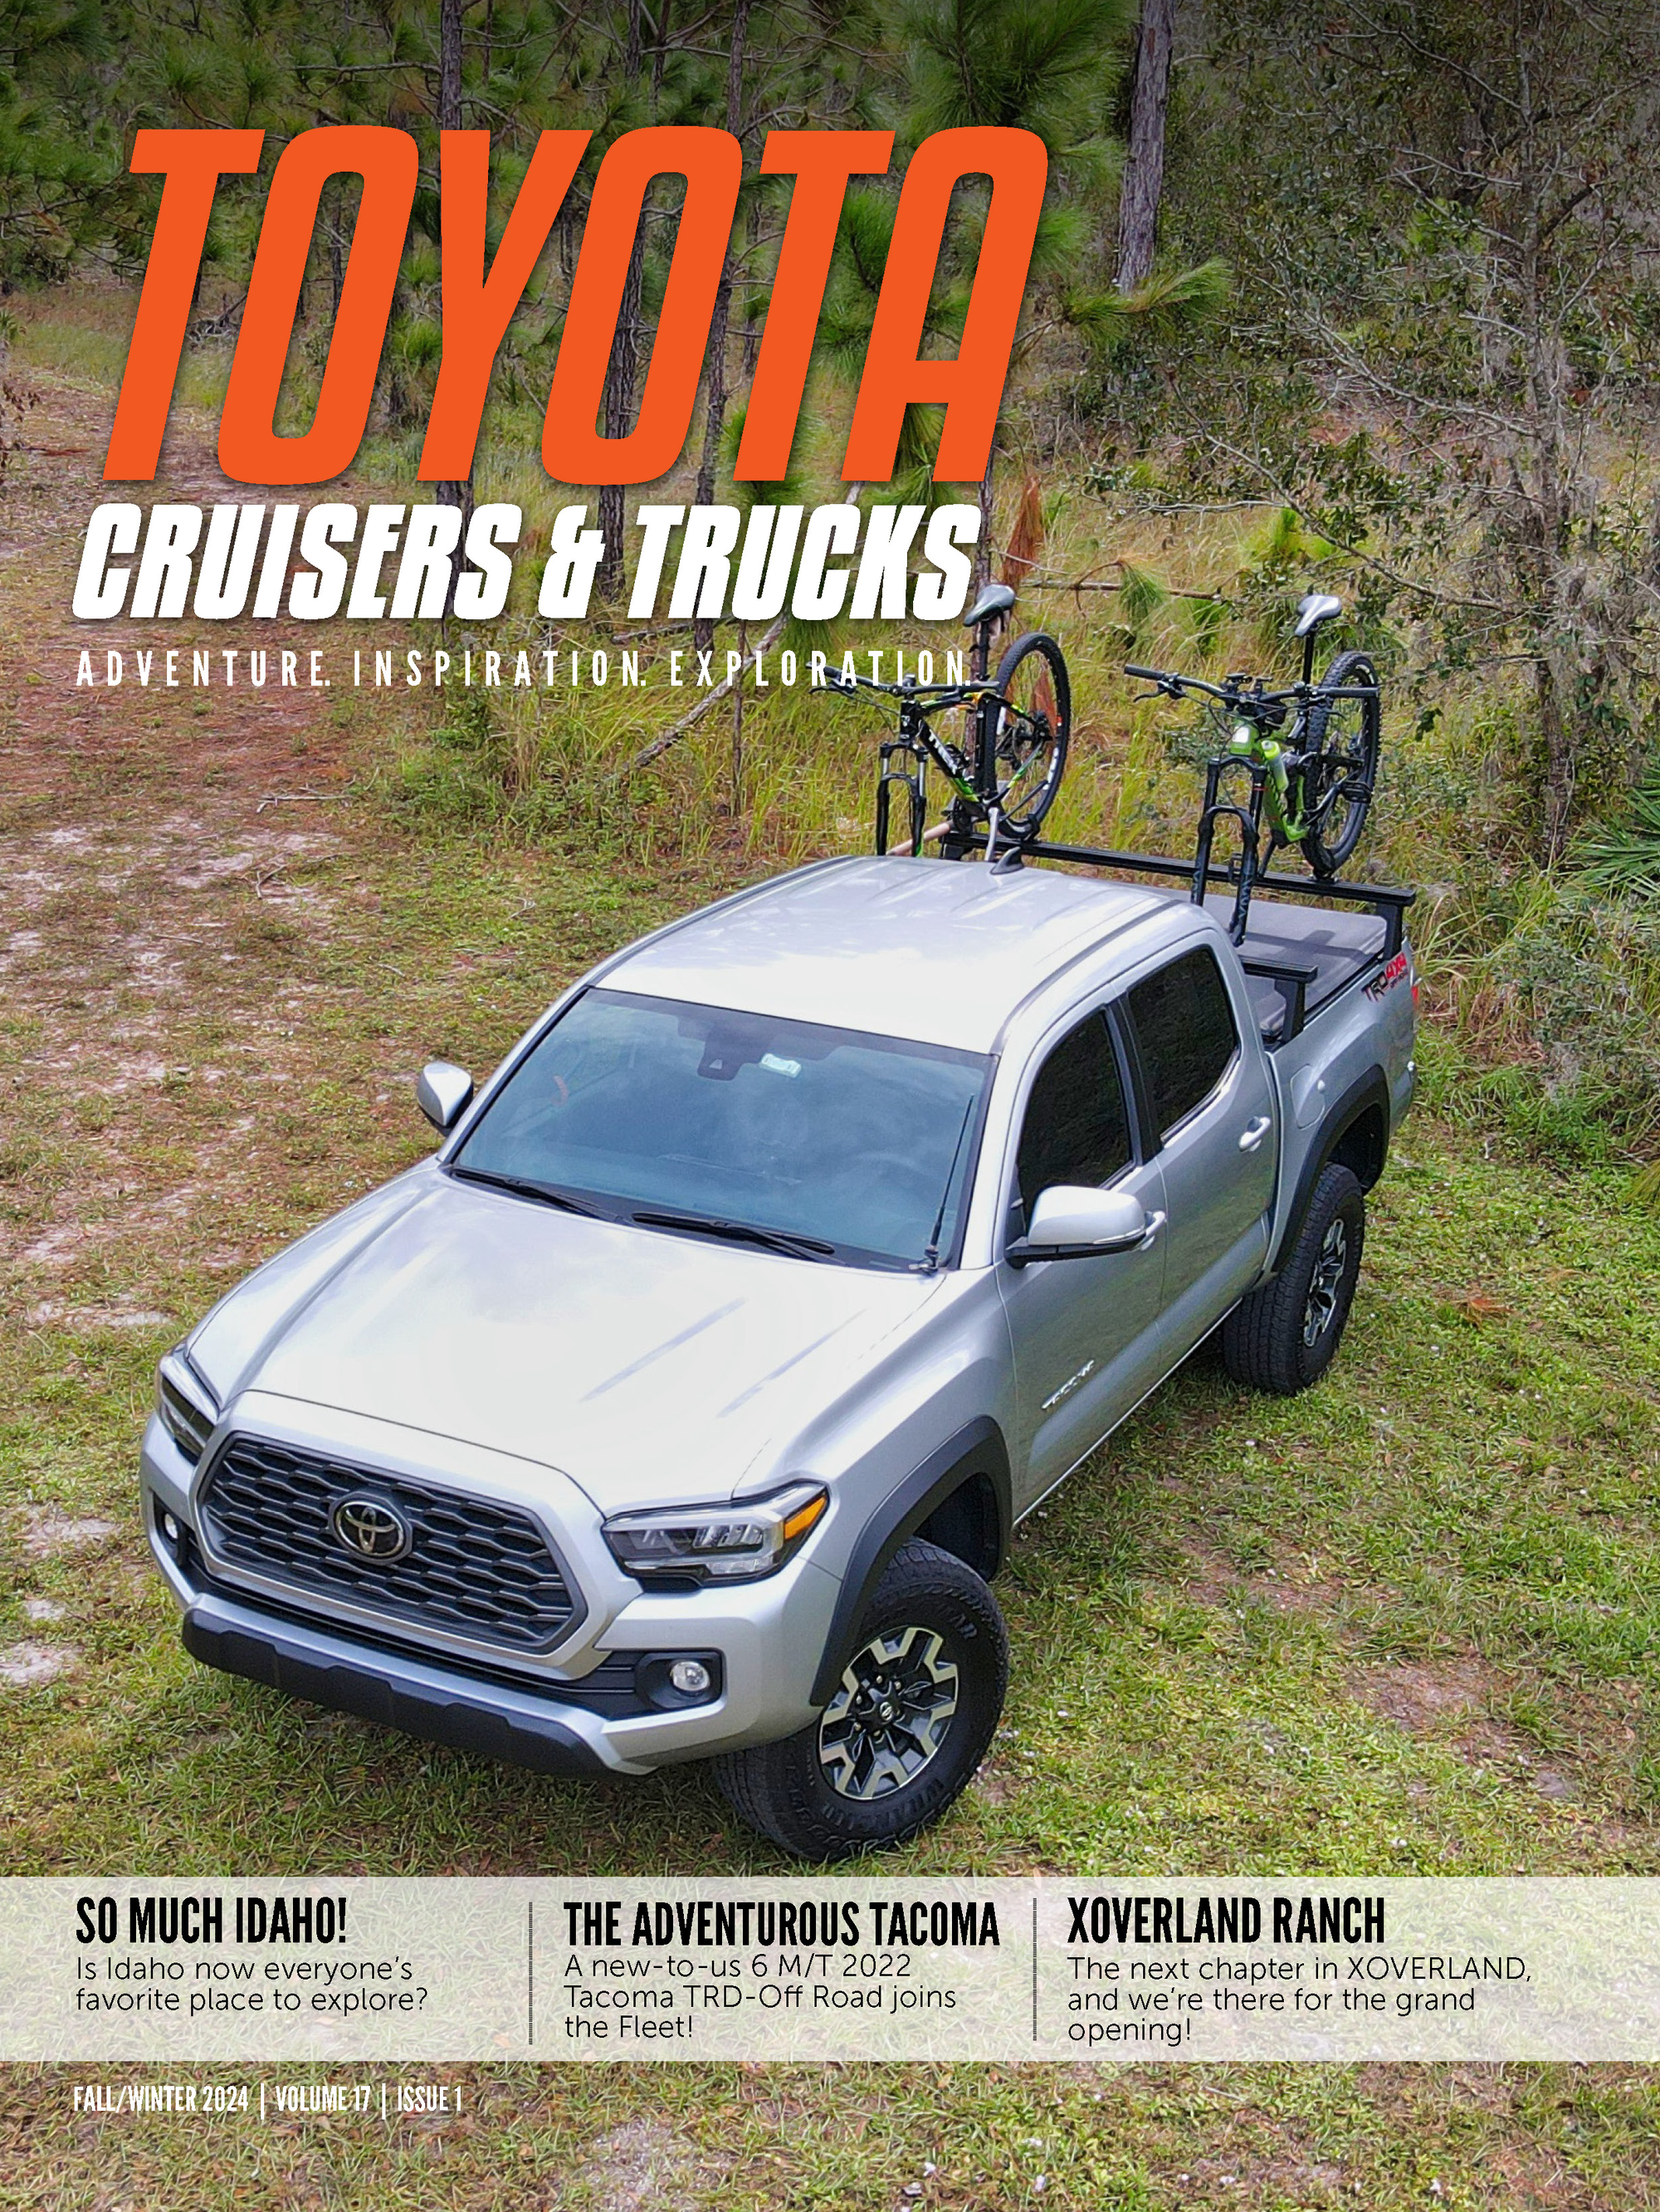
Related Articles
With the crush sleeve in place, obtaining the correct pinion bearing preload is one of the most critical steps. If it is too tight, you will burn your bearings and if it is too loose the pinion depth will change. You have to slowly crush the preload spacer to about 12-15 inch-pounds. When using the dial indicator, Nitro recommends measuring the indicator needle perpendicular to the drive side of the ring gear teeth.
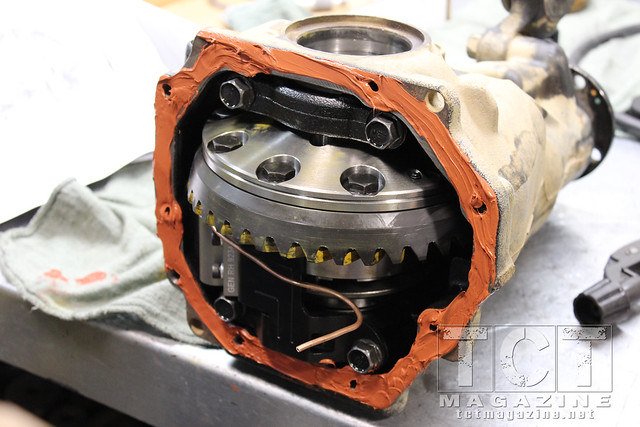
We measured in a few spots for variance. Once this was in place, we finalized backlash measurements on the ring gear checking for contact patterns on the teeth. They should be centered between the face and flank.The contact pattern indicates the pinion depth in relation to axle centerline. We reassembled the differential housing and tested for air leaks. The same procedure is followed for both front and rear differentials.
After the differentials were installed, we ran the airlines and then the locker switch on the dash was installed. TJM uses a 6mm airline hose with a 90-degree swivel fitting at the solenoid. This is much better than a fixed fitting as it allows for some movement. I opted to run the TJM lockers by an ARB high output air compressor, so I could air up tires on the trail.
I can’t say enough about the professionalism, knowledge and customer service from both Slee Off-Road and Just Differentials. Carl is a wealth of knowledge when it comes to differentials and can answer all your questions. One thing I was really impressed with is that Slee tries to use Toyota replacement parts wherever they can, even down to the 80 Series dash differential locking switch. Thanks to the fast shipping from JT’s and the knowledge at Slee, this project only took two days.