
2015 4Runner SR5 | Crawl Control Retrofit!


Like a lot of people, I am disappointed Toyota does not offer the Trail Edition with a 3rd row seating option. We decided to settle on the SR5 because seating for more than 5 people was mandatory for our family. One option is to get a Trail Edition and add a 3rd row, but safety for my family is of the utmost importance. The SR5 includes additional air bags and safety equipment designed for the 3rd row. Being the engineer that I am, I decided to look a little further into the Crawl Control Circuit and see if it was somehow possible to put this into my SR5. Why not just go straight for lockers? I am a technology guy, and Toyota has really developed some great off-road Technology and I really wanted this over lockers to start with.
I started off by doing a pretty extensive search of the internet forums and found nothing, just a lot of people wanting a Trail with 3rd row seating (BIG HINT TOYOTA!). I started by purchasing a 2-day subscription to the Toyota TIS website for $15 (https://techinfo.toyota.com). This provides access to schematics and repair manual information needed for this mod.
I found the schematic for the Crawl Control and Multi-Terrain Select. Upon closer examination, Toyota actually calls the Crawl Control Switch, the Drive Monitor Switch. There are six connections on this switch and they are Constant +12V(+B), Switched +12V(IG), Ground, 2 CAN bus connections (CANN and CANP) and LINT. From finding a section in the repair manual about the Drive Monitor switch, it appeared that the brains for all of this are right in the switch assembly itself and communicates with the Combination Meter via LINT and the rest of the system via the CAN bus.
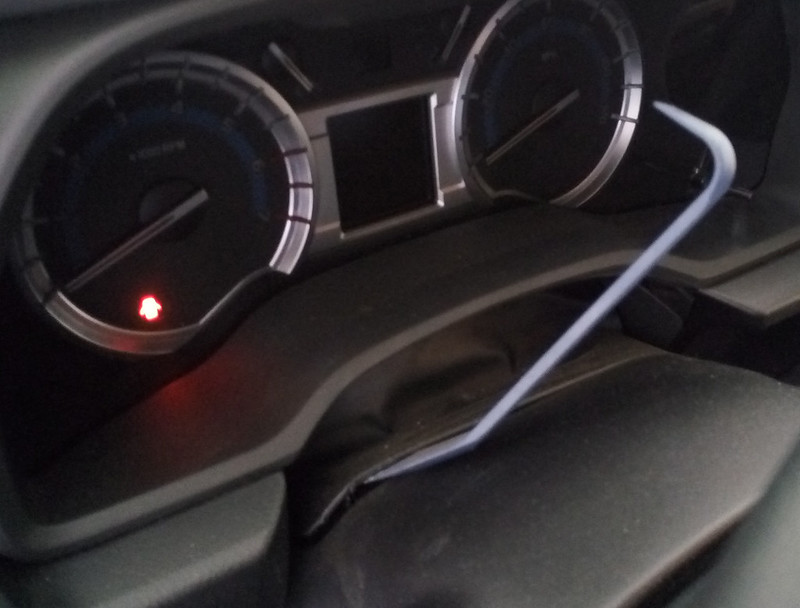
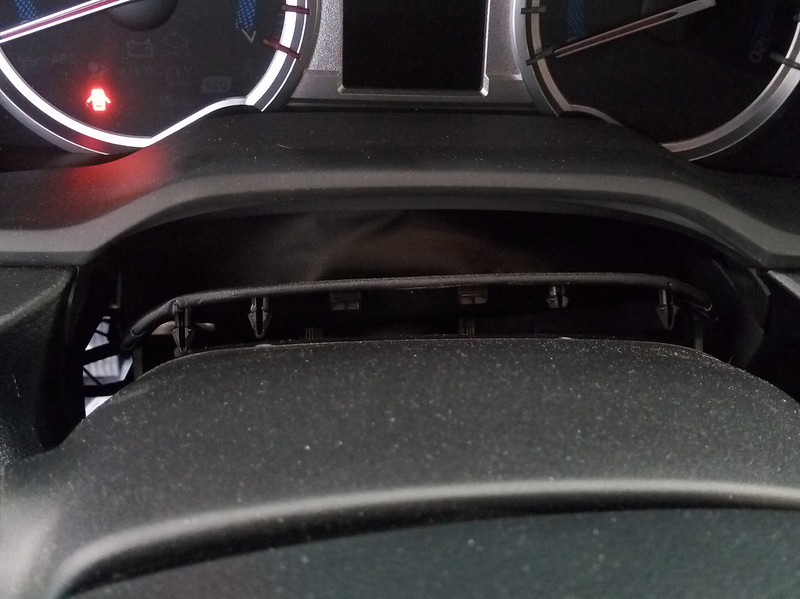
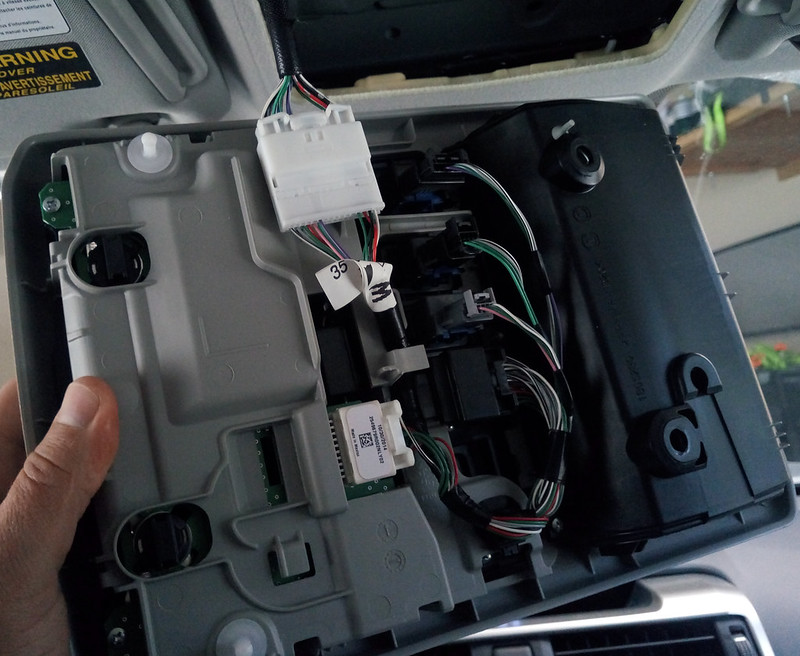
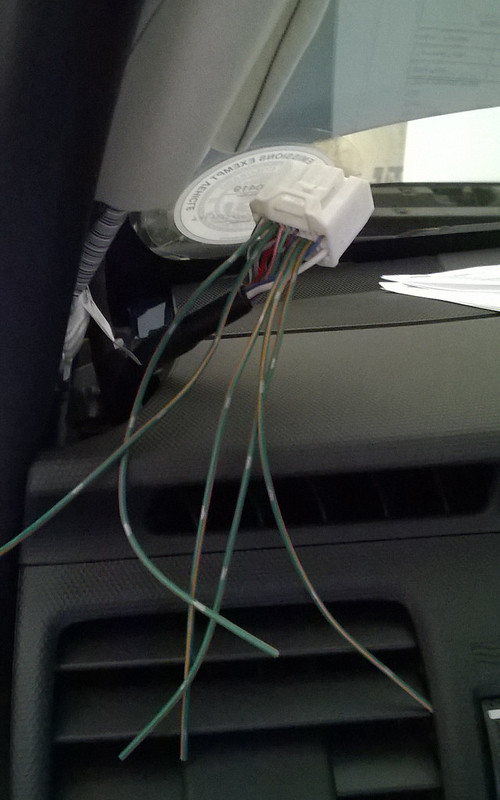
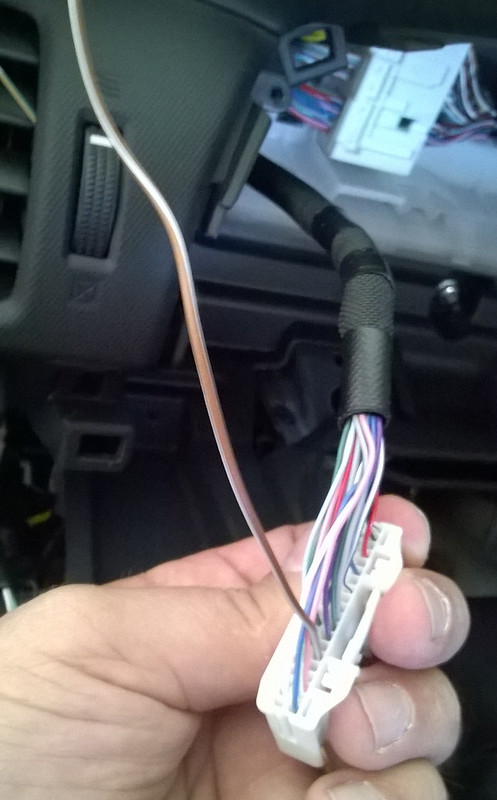
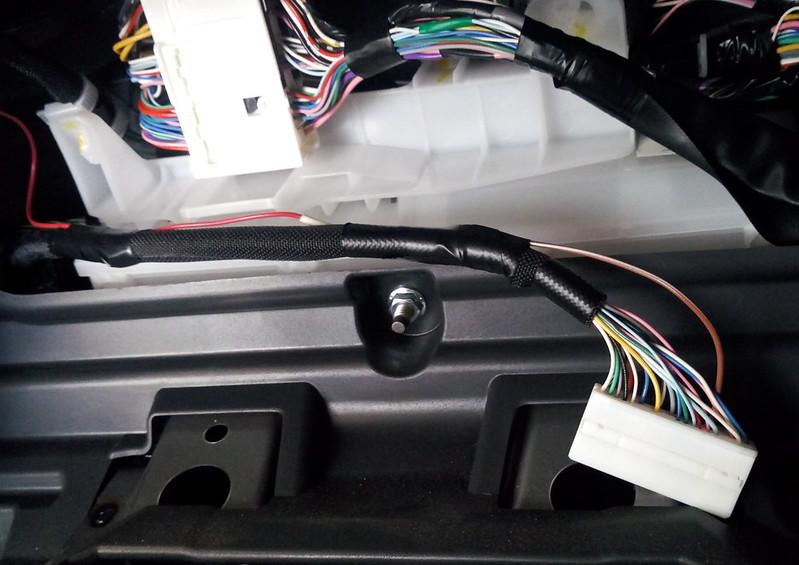
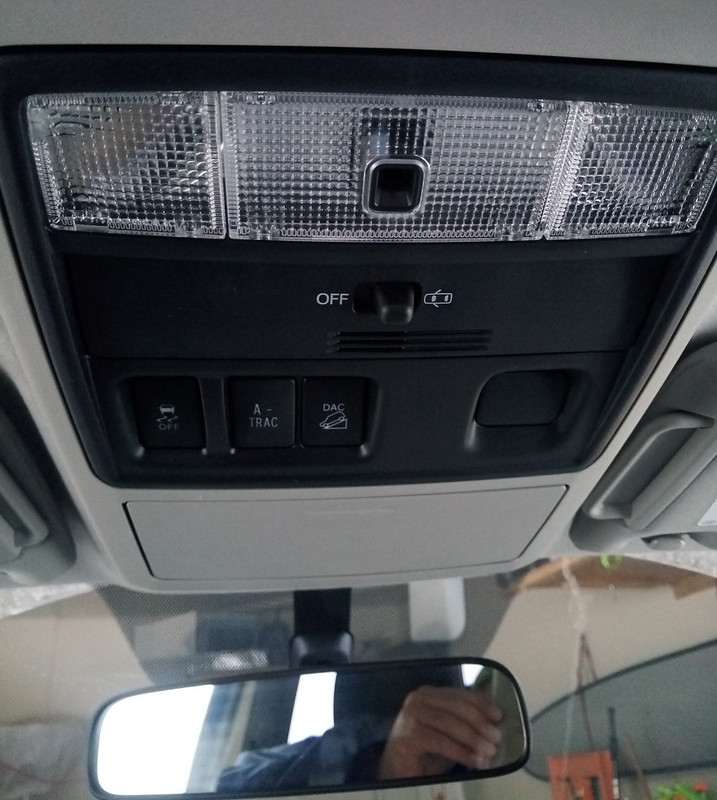
I examined the actual wiring in my SR5. Removing the dash components is pretty straightforward (FIG 1A-D). From the overhead console (Connection SU1, FIG 2A) down to the A-Pillar (Connection FS1 Male, FIG 2B) all wiring was in place. From Connection FS1 (Female, FIG 2B) down, the needed wires were missing. The connection F14 (FIG 2C and 2D) for Combination Meter was missing the LINT wire and the F10 Connection on the Body Control Module was missing the 2 CAN bus wires as well.
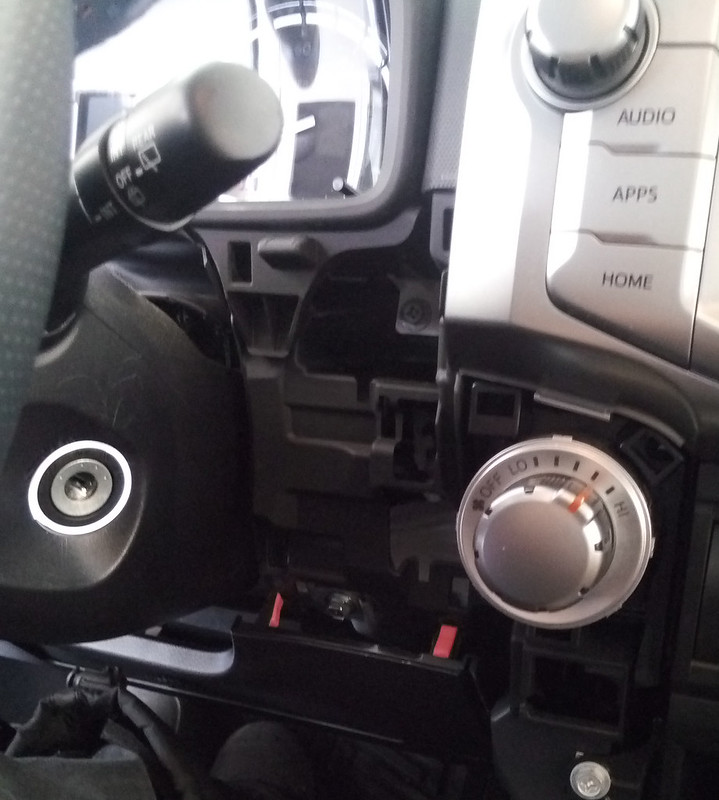
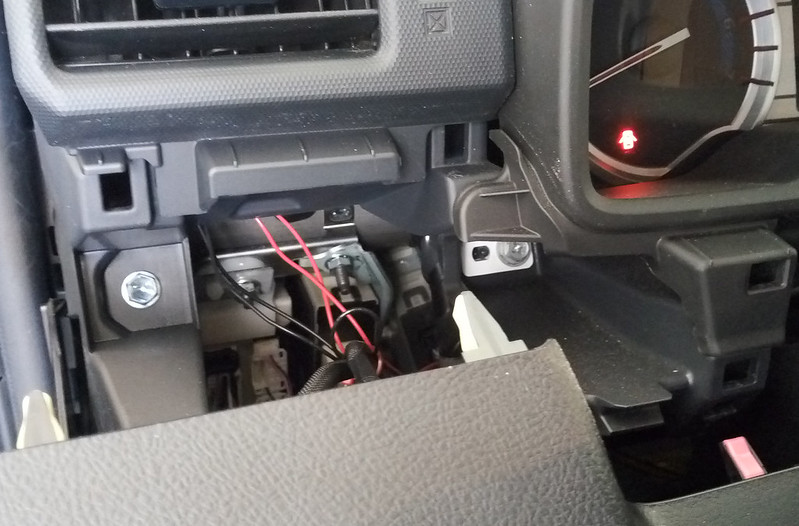
I researchedto find the proper repair harness parts that plug directly into the connectors. I was able to find all of the connector repair parts except for the F10 connector on the Body Control Module (still working this through Toyota as the repair manual shows no repair part numbers for this connector). For this one I was able to strip the 22AWG wire back and fold it back on itself and slide it in the connector with some dielectric grease to make a good connection. If I cannot get a repair part, I will just epoxy the wire in place as is. I got all of the other repair parts plugged into the proper connectors and soldered the physical connections between all the wires and used heat-shrink tubing to protect the connections. I used AWG 22 wire between all the points. For the source ends of the +12V switched (IG) and Constant (+B), I connected them to the switched and constant wires leading to the Steering Sensor right in the steering column. The Trail has them connected this same way but through connectors hidden way up under the dash. I tried to find them, but it was easier to do it this way. I used some T-Taps for these, which is easy to access by pulling off the plastic covers on the steering column. You could always use whatever switched and constant sources you want, but I chose to keep it the same as the Trail.
Next up is replacing the stock Body Control Module (BCM) with one from a Trail. This unit acts as a gateway for the Drive Monitor Switch to communicate on the CAN bus and the 2 pins needed (CANN and CANP) are disabled on the stock SR5 BCM. This is quite simple and you just need to unplug the harnesses from the BCM and use the release mechanism to allow the BCM to come out of its holder. You do not need to do any kind of initialization on the BCM; just plug and play.
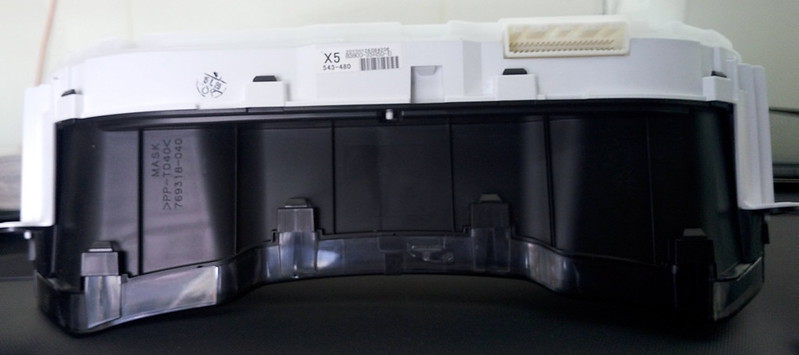
After this is complete the hard stuff is done. The Combination Meter needs to be swapped out with one from a Trail unit as well (FIG 1E, FIG 3). The Trail unit has the LINT connection enabled and the programming to display and enable the Multi-Terrain Select and Crawl Control. This may be the most difficult part to get.

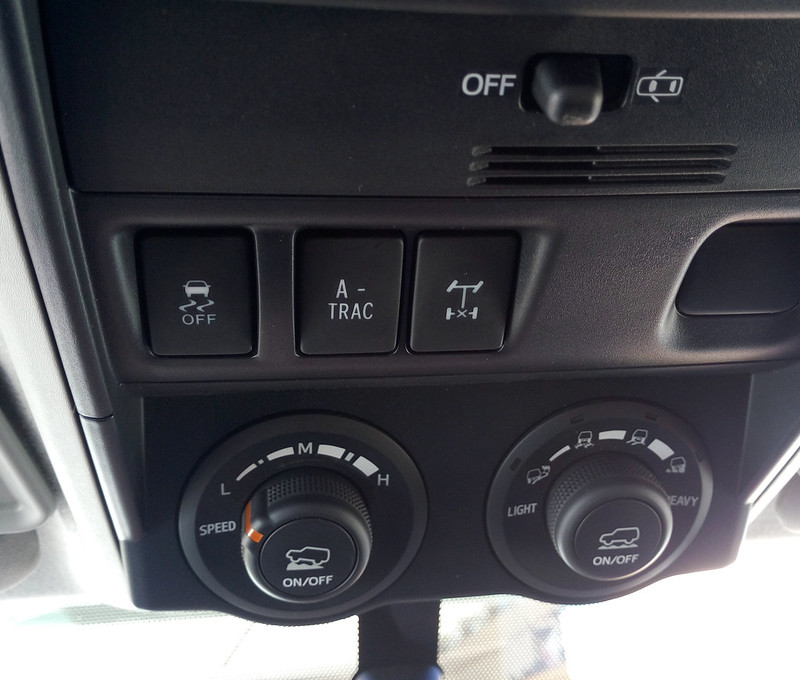
I connected with a great dealership that wanted to help me out and was able to order a new Combination Meter with the correct mileage on my 4Runner (more on this below). You will also have to order the Drive Monitor Switch and a new Overhead Console from a Trail to mount the switch. Once you have these you can get everything plugged in. One thing I was hoping to do was keep the DAC switch. What I found out is that when you do a memory reset and do the Crawl Control Calibration, it disables the DAC Calibration. Whatever one you do first, the other is disabled. Thus, there is no way to have Crawl Control and DAC.
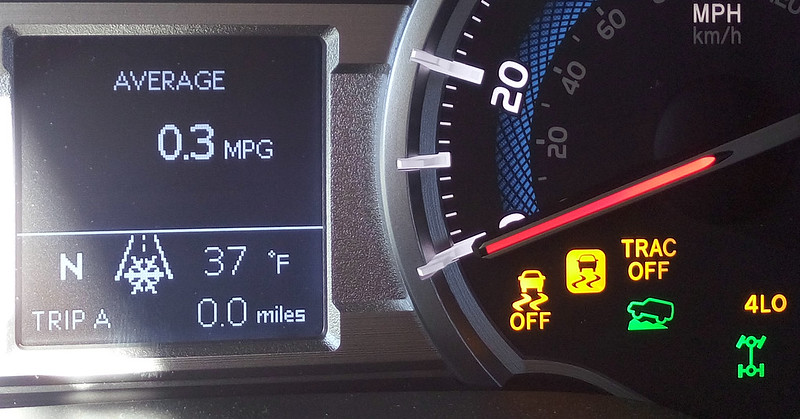
Once everything is hooked up and back in place, you will need to do a Memory Reset for the Skid Control ECU, then a Crawl Control Calibration and Zero Point Calibration. It is important to do the memory reset otherwise the crawl control calibration will not work. These can be easily done through Techstream Lite with the mini-vci connector or you can do it manually by using a jumper wire on the ODBI port. See the repair manual for detailed information on this procedure. After this, everything will work just like the Trail. Overall I am extremely happy with this retrofit and looks completely factory including the display lights in the combo meter (FIG 4A-4D).

Certainly feel free to email me (stevek@staythetrail.org) with any questions or comments you may have about this and I will do my best to help.
Some things to note:
I did this on a 2015 SR5 4Runner base model. The part numbers listed below are what I used for this mod.
Part Numbers used:
Drive Monitor Switch: 84977-35020 (x1)
Trail Body Control Module: 89220-35340 (x1)
Trail Combination Meter: 83800-35R40-RP (x1)
Base Trail Overhead Console: 81260-35650-B0 (x1)
FS1 Connector Repair wire (Female side): 82998-24290 (x5)
F14 Connector Repair wire: 82998-12870 (x1)
Misc used:
AWG 22 Wire, Heat Shrink Tubing, Soldering Iron and Solder, wire strippers/Cutters, screw drivers, and plastic trim removal tools.
There may be some slight variance in the BCM part number needed and Overhead Console depending on what configuration you have. If you have a Premium model, you would need the Overhead Console from a Trail Premium. There are a few choices with the BCM as well: just try to match the version you have to the equivalent Trail version. The part number stamped on the BCM does not always dictate what you may have. This stumped me for a bit as I was researching this. A lot of people who have a Trail version do not have a part number that corresponds to a Trail version. It would appear the BCM modules themselves are the same, it is just the program in them is different. When I received the Trail version I ordered, the right part number was on the box, but the one on the actual BCM was showing for something else.
From 2014 on up Toyota Changed the Combination Meter as well as the part number for the Crawl Control Switch. Make sure you get the equivalent part numbers from your year. For 2010 to 2013 you should still be able to do this mod, but you will need that center display that is in the middle of the dash as well (Accessory Meter). I am not sure if you will need additional wiring, but possibly.
If you have a Limited, I am unsure whether or not this will work, but leaning towards not working. The Skid Control ECU Part numbers are different on the Limited so it probably has different programming. Also, there is no center diff lock light in the trail Combo Meter. It would be interesting to see if it could be done though.
Special Thanks:
I could have not have completed this mod without the help of Toyota Cruisers and Trucks Magazine and them putting me in touch with Tim Bernard, the Parts Manager, at Larry H. Miller Toyota in Colorado Springs, Colorado. Tim was extremely receptive to what I was trying to do and offered to help out in any way he could. He was able to get the remaining pieces I needed to complete this mod without any issue. He is willing to help anyone out there that reads this article and wants to do the same thing. Please contact the dealership at 866-554-0772 and ask for Tim Bernard in parts. Please let Tim know that you read about this article and we sent you.
[flickr set=72157672117789462]
To get your copy of theSpring 2016 Issue:   FIND US ON: |